So, we’ve talked quite a bit about planning out projects using Azure Boards. We’ve discussed work items and how we can use them to identify important items to work on using Epics, and how to split them further into User Stories and Tasks. We’ve skimmed the upper layers of using Sprints and how we can use them to deliver our project requirements. Between the two, we’ve figured out how to outline our project in a straight-forward and easily visualisable way and to be able to sub-divide and organise our tasks into specific time intervals, helping us get our project delivered.
But. What if you have a project that doesn’t easily break down into the kind of tasks that take a sprint or less? What if your project is actually better served by processing your backlog in a way that works for the capacity for your team rather than adhering to a time box? Do your project deliverables come through a pipeline of steps that are reproducible and scalable? Then Kanban might be the way for you.
Kanban was originally conceived by Toyota in the late 1940’s, when they were attempting to retune their engineering process towards a model best described as just-in-time. What does that mean, you ask? Let’s assume I’m building a large number of a particular car on a production line and I have a set of steps in the process, where the output of one step is the input to the next step. Let’s suppose that step 2 in the process suddenly has too much product coming through from step 1, more than it can handle. This results in a bottleneck, where the flow of work in progress has slowed down or stopped because the capacity at step 2 in the process has been overwhelmed, resulting in a queue. Capacity limits can be breached in a few different ways, such as too much input coming in to be processed or a reduced ability to process the input in the expected timeframe. To combat this, you identify the likely bottleneck in the system, work out the capacity it can support and then retune the system to ensure that the flow of work in progress is not more than the bottleneck can handle but is a high enough amount to ensure that you’re always running at an optimal rate of flow. In addition, by optimising for flow, you can predict how much of a resource you’ll need at each step, making strategic planning easier.
So, let’s look at how this fits in Azure Boards. In this case, we’ve moved away from the Glastonbury festival in the last two posts and on to something more business oriented, where I’m baking cupcakes and delivering them to customers. Each stage might require a different skillset (in this case, baking, packaging and delivering) and therefore a different team, with each team having a different work capacity. So let’s dig in.
You can access the Kanban board by clicking the Boards sub-item, directly beneath Work Items, on the left hand side menu.
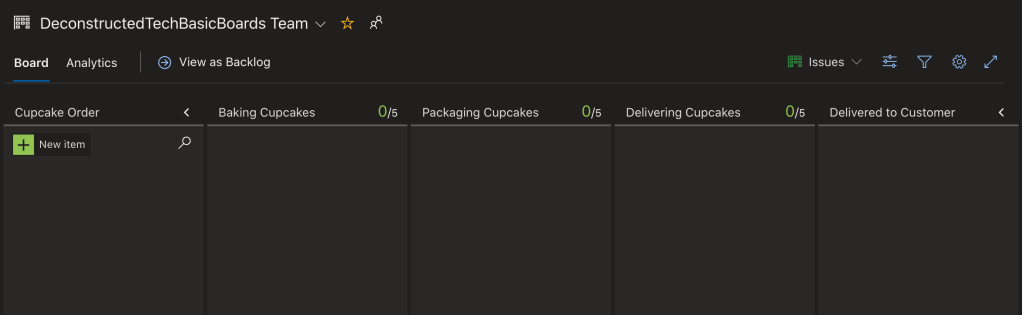
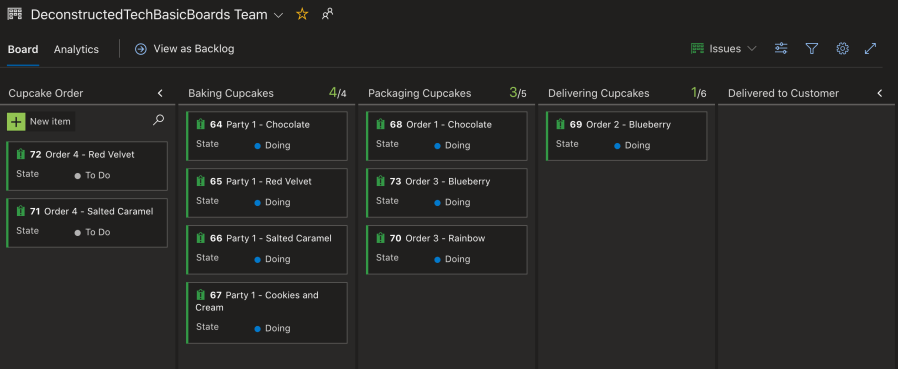
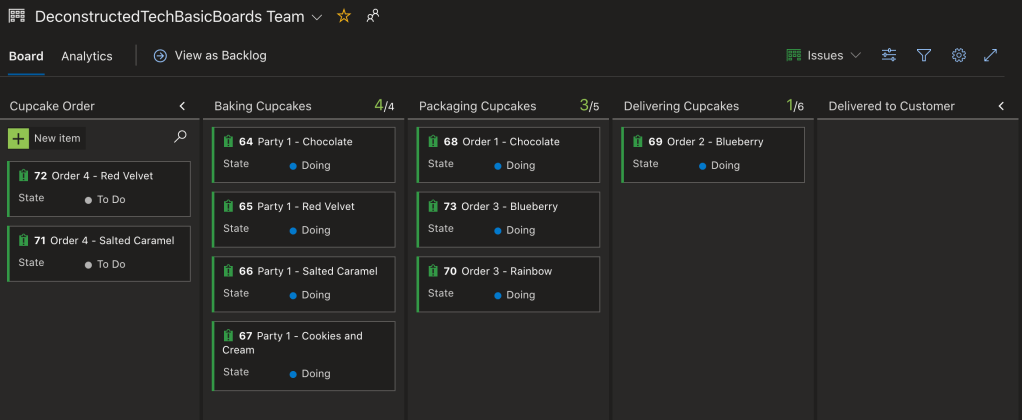
When you open it up, you’ll notice a set of columns, with a minimum of three; in this case, I’ve added a few more and renamed them: Cupcake Order, Baking Cupcakes, Packaging Cupcakes, Delivering Cupcakes and Delivered to Customer. These columns are named to suit this project.
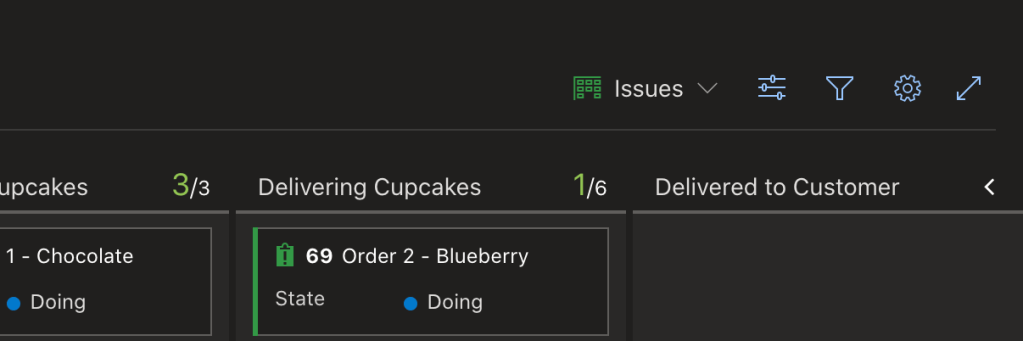
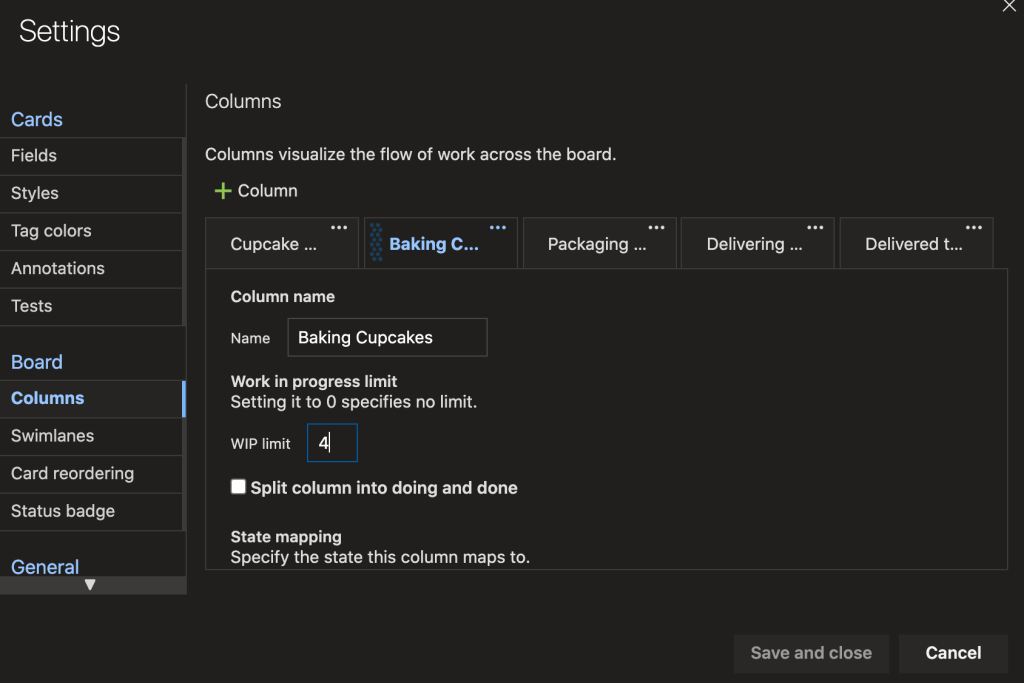
At each stage of the process, we need to identify how much we can achieve before we hit our maximum work capacity. This is referred to as a WIP Limit, where we’ve calculated exactly how many items can be in the column at any given time. Note that only the middle columns can use a WIP limit; Cupcake Order is equivalent to the backlog where new orders are added, whereas the right most column is for cupcakes that have been delivered, for which a WIP limit is irrelevant. You can see what the WIP limit is, as well as the current amount of WIP in that column, to the right of the column name; in the example above, the Baking Cupcakes column has zero WIP items and a WIP limit of five items. These numbers tell us that if we are working on five WIP items and the WIP limit for the column is five then we are fully utilised. I can adjust the size of my WIP limit or add/remove columns by clicking the cog icon on the right hand toolbar on the Boards screen, then selecting Board -> Columns from the dialog that appears.
Your obvious next question is: how do I calculate my WIP limit? How do I know what my work capacity is? The answer that fits most situations will be something along the lines of 2 or 3 times the number of members in your team. That’s a fairly rough number, but consider the number of dimensions to what’s being asked: how much of a difference is there between making a chocolate cupcake vs a blueberry cupcake, as opposed to a chocolate cupcake vs a chocolate cake? Then how many of these can I safely have on the go at a given time? Then consider how many cupcake types can I be baking at once that my packaging team can handle at the same time? Then expand it out to the number of cupcake types I can not only bake, but also package, then also deliver? The short answer is that this is not an easy question to solve and that it’s quite situationally dependent as well as dependent on the entire pipeline of work. You may find that you need to test out a limit for a few weeks before you decide to keep it or change it.
So let’s take a practical example. I have a new order for cupcakes for a party a customer is hosting. My orders would initially start on the backlog and should be fairly well outlined. The backlog would also be ordered by priority, so we know that the highest priority item in the backlog is the next one to be worked on (in the case of cupcakes, it might be ordered in terms of which cupcake order turned up first or perhaps ordered to fit the size of the oven). As the order starts the fulfilment process, the item would be moved from the Cupcake Order column to the Baking Cupcakes column, signifying the next step in the process. Azure Boards supports drag and drop on the boards, which makes life easier.
Let’s take a slightly different example. I need to get a server built and configured to a particular specification. Phase 1 might involve me taking in the requirements for the new server; phase 2 may involve the server being deployed off a customised image, taking the requirements from phase 1 into account. Phase 3 might involve post-build customisation (depending on the datacenter or region, which DNS servers should I be configured with?), while phase 4 might involve post-build testing to ensure it’s ready to deliver to the requestor. One way to help deploy it faster might be to identify how to get maximum benefit out of each stage by using automation and taking manual steps out of the equation, with the benefit of freeing up the human resources for more useful and interesting things. To put that into perspective, many car production companies are heavily invested into automated robotics for their assembly lines, reducing the overall time from backlog to completion.

Kanban can suit many different types of work, from writing code to building servers to making cupcakes to anything where you can hand off work from one team to another, each with clearly defined capabilities and responsibilities, all focused on product delivery. It’s not going to suit every project – in fact, some projects will never fit perfectly within the Kanban style of work planning – but for certain project types it works brilliantly. There’s still plenty to go into on this – we haven’t discussed swimlanes or cumulative flow diagrams, for example – but I’m sure for every team out there wanting to do better at delivery – regardless of whether it’s code or cupcakes – there’s something in here worth digging deeper on.
