
So, welcome back.
You’ll remember last time (you can find Part 1 here) that we began talking about using Azure DevOps, a tool normally used for code management using one of several Agile methodologies, to organise some of your non-code related project work. We created an Azure DevOps organisation and then a project inside it called DeconstructedTechBasic, an example we’ll continue with throughout this series.

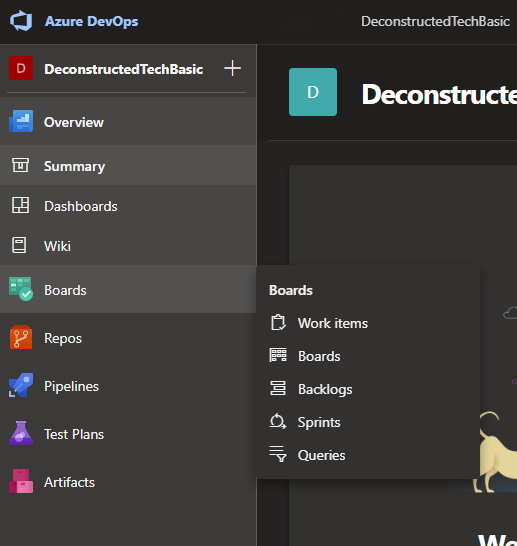
If you hover your mouse over the Boards blade, you’ll see a context menu pop out. As we covered last time, there will be five items: Work Items, Boards, Backlogs, Sprints and Queries. In this post, we’re going to look at Work Items.
Work items are effectively to-do items, which you can classify and organise in several different ways, that help you outline what needs to be done in your project. You can link work items together as well, perhaps in a hierarchy, as related items or as a predecessor or successor.
I mentioned hierarchy, so here it goes (at least for Basic, which is a simplified version of an Agile method): at the top you have what are known as Epics, which are groups of work items and take a more strategic view; then you have Issues, which are individual pieces of work that you want to track; and finally you have Tasks, which are specific elements of an Issue that you want to work on.
To give you a concrete example, I might classify my plan for attending a music festival as an Epic, organising accommodation and travel as individual Issues and buying a tent, sleeping bag, bedroll and booking a coach as individual Tasks. Then I would link the Tasks up to the associated Issues and then the Issues up to the Epic. I’m not limited to one Epic per project; I can create as many as I want for each larger piece of work I want to do, and then break each one down in a more granular fashion with Issues and then Tasks.
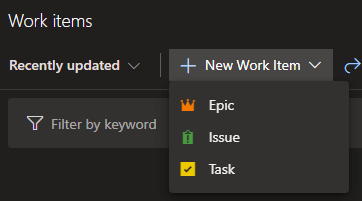
So let’s create an Epic.
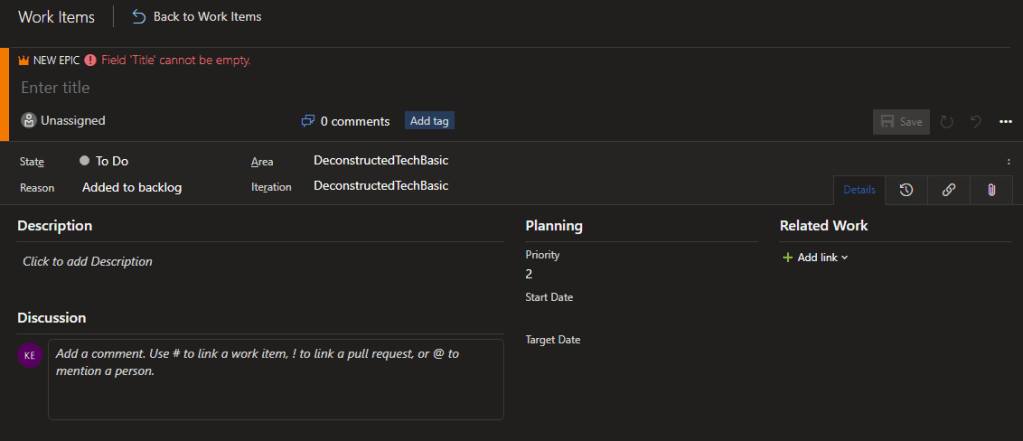
There’s quite a bit to unpack here, so let’s start with the most obvious stuff. First, you need a Title, which is just a high level description of the item. Description is obviously where you go into more detail. Where it says Unassigned is actually a drop down box so you can assign the work item to a particular member of the project. Until you save the item, State will show as “To Do” and Reason will be “Added to Backlog”, which makes sense (more detail on what the backlog is later). To the right of Unassigned, you’ll notice the count of comments, which you add in the Discussion area at the bottom to help provide additional context and foster communication between people who might be involved at some level with the item.
There’s also the option to make use of tags, which are a useful way of classifying your work items (for example, if I was creating a work item about a music festival we’re planning to go to, I might tag it with “festival” or “event”). This makes searching for it by category much easier, especially when you have a long list of work items and some that are a similar category but not under the same Epic or Issue.
We’re going to come back to Area and Iteration in a later post, so let’s move onto Planning. Here, you can specify a priority for the item, a start date and a target date. Microsoft defines priority in this context from 1 being most important to 3 being not critical and possibly optional. Start and Target date are useful for queries (as searchable metadata) and project planning.
Related Work is where things get particularly interesting. Here, we can link one piece of work to another, so you can link an Issue to the Epic for example. Under “Work items to link”, I can specify the item by its ID or start typing in keywords.

However, there are multiple ways to classify the link; for example, an Epic is typically a parent item to an Issue, or one Epic might be related to another Epic. In this way, we can link items together in a web similar to a mind map, a hierarchy or a graph.
If you hit Save, it’ll create the Epic.
A few final points to note: there are four tabs for the bottom section of the window.
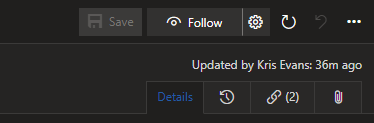
The Details tab is for the one we’re on. I’ve added some information, such as the Start Date (let’s say we’re starting to plan today) and the Target Date (for the day after the festival).

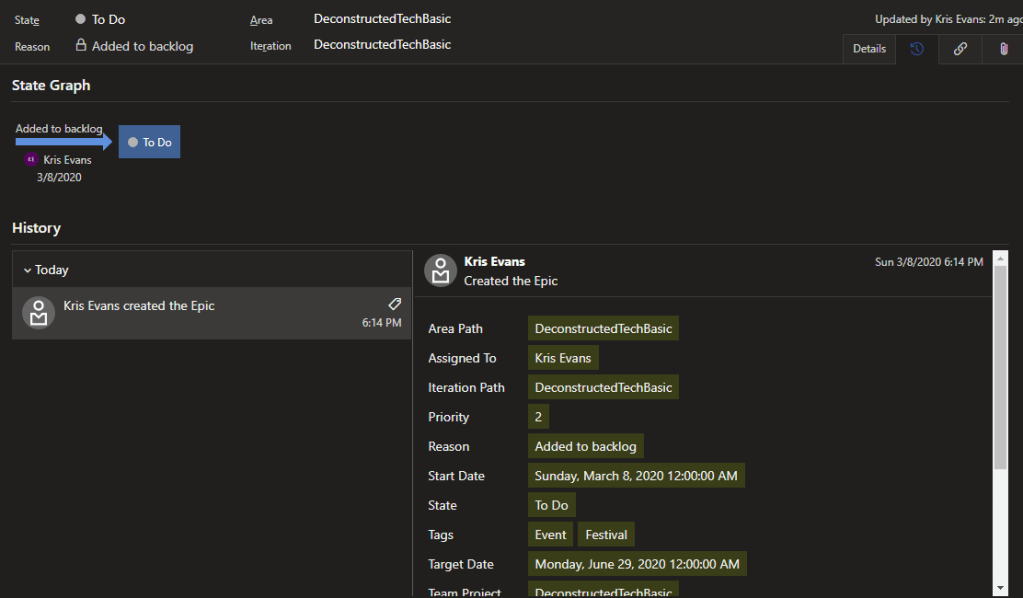
The next one shows the history of the work item, specifically around changes to the metadata (i.e. time changes, tag changes, etc) every time you hit the Save button. This is useful for tracking changes to the work item.
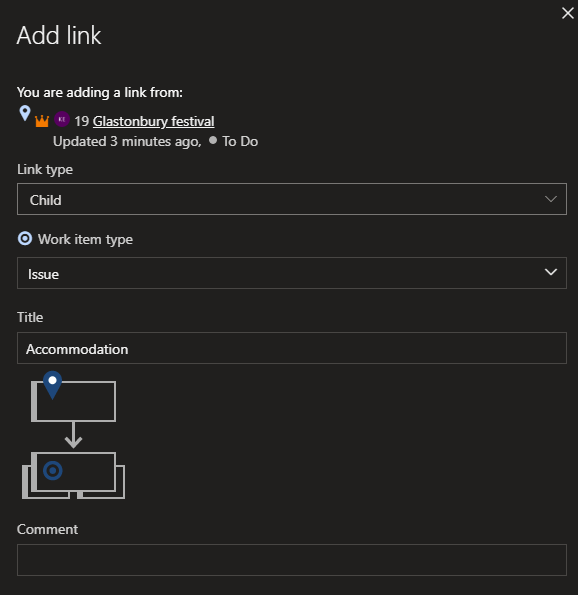
The Links tab shows the related work (as mentioned above). I can create a link to an existing item or create a new item and link to it immediately; here, I’m creating a new Issue called Accommodation to illustrate that. Notice that I’ve added it as a Child item and I’ve made it an Issue.
Here’s how it looks after the Issue has been created:

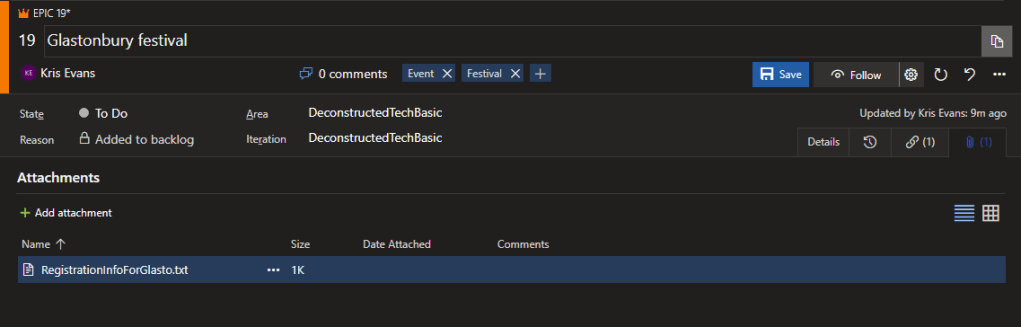
Finally, you can add attachments as well, such as images or presentations. I’ve added a file with the registration details for the festival.
So those are the main points of adding an Epic. But what about Issues or Tasks? I’m glad you asked…
Here’s the Issue I added as a child earlier:

Note that we no longer have Start Date or Target Date fields, but now we have Effort. This one is quite subjective and relates to a number value relating to how big an item this is to achieve; the higher the number, the more effort required to complete it. But what number do you put in? The suggestions I’ve seen have included using powers of 2 (1, 2, 4, 8, 16), which I feel is a fairly simple and easy metric.
Also note, that you can see under Related Work that the Parent item is the Epic we created earlier and there’s also a Child item for a specific Task we want to complete (in this case, buying a tent). Finally, if you’re using the built in Repo functionality of Azure DevOps, you can link the work item to a specific commit, pull request or branch. If you’re not using Repos, then don’t worry about it.
So about buying that tent, let’s have a look at the Task:

This time, we have two other new fields: Activity and Remaining Work. The Activity field comes with some pre-made entries aligned more towards coding, but you can add your own (for example, instead of the pre-canned Design, Documentation or Testing entries, I added Purchase). Remaining Work is a number that represents hours or days left in the task (I’d recommend making this either one or the other rather than mixing durations; it may make any reporting or planning you do using other parts of the tool easier). As I’ve only just added the Task and I don’t think it’ll take too long, I’ve made it two hours.
One final point: I’ve now also got the option of changing the State from To Do to either Doing or Done. This helps you see at a glance where you’re at with particular items. We’ll come back to that in a later post when it comes to scheduling and organising the execution of work.

If we now go back to the root Work Items page, you can see the three items I’ve created:

Note that I can filter the list of work items by a few different fields: by keyword, type of object (Epic, Issue or Task), who it’s assigned to, what its state is, Area (we’ll cover that in another post) and tags. By clicking Column Options, I can add more columns (such as Tags) to the display so I can see more information.
And to finish off, here’s a diagram of how I’ve organised two music festivals in Azure Boards using links.

It’s pretty easy to see how you can use this as a fairly powerful project planner, even if you’re not a project manager. But now that we’ve isolated what we need to do, how do we organise when to do it? The next post in the series will cover precisely that…
Check back soon for the next post in the series or subscribe to my email list using the Follow Blog via Email option on the sidebar. And if you’ve got any questions, feel free to get in contact or leave a comment below. Thanks and speak soon!

Pingback: Using Azure DevOps for General Planning – Sprints and Time Management – Deconstructed Tech
Pingback: Using Azure DevOps for General Planning – Kanban Boards – Deconstructed Tech